The roof is the shield that protects a building’s occupants from rain, snow, and sun. It also plays a critical role in architectural design, offering opportunities for aesthetic expression and energy efficiency.
Watch as these pro roofing contractors prepare the job site to keep it clean and safe, strip the old roof down to sheathing, and install a drip edge and underlayment. Then they show how to layout and install shingles and step flashing. Contact Lakewood Roofing for professional help.
Roofing materials are a critical component of a home’s overall design and construction. A well-chosen roofing material can protect the building from severe weather, reduce heating and cooling costs and enhance the aesthetic of the exterior and interior of the house. There are many different roofing materials available on the market, each with its own advantages and disadvantages. A few of the most popular roofing materials include asphalt shingles, clay tiles and slate, aluminum roof panels, and standing seam metal.
Asphalt shingles are a classic roofing material found on most modern homes. They are easy to install, inexpensive and durable. They are available in a variety of styles and colors to complement different architectural designs.
Other roofing materials, like wood shingles and shakes and clay tile, are more expensive but are more attractive to the eye and can last 50 years or more. However, these roofing materials require more frequent maintenance than other materials and are susceptible to rot and insect damage.
Slate is a beautiful roofing material that can give your home a Mediterranean look. It is fire-proof, non-fading and withstands strong winds and hail storms. However, it is heavy and may require additional framing support during installation.
Standing seam metal roofing is a unique style of roofing that requires the construction of special roof supports. This type of roof is very durable, and can withstand high wind speeds, snow load, and ice dams. It also comes in a variety of finish options, from the subtle gray of zinc to a shiny polished silver that can match many other building materials.
Stainless steel is an extremely versatile material that can be used for roofing, walls, trim and even flooring. Its durability and timeless beauty make it a desirable material for many designers and architects. It is resistant to a wide range of corrosive chemicals, and can be made to appear almost any color or texture.
Solar roofing materials are a growing trend in the United States. These shingle-like units generate electricity from sunlight, which they store in a battery or send to the power grid. In some cases, they can be installed over or in conjunction with existing shingles.
Installation
Roofing is the process of installing or replacing the material that covers a building’s frame and protects it from rain, snow, sunlight, and wind. Depending on the materials chosen, this can include shingles, tiles, metal panels, or some combination. Regardless of the type chosen, all roofing must provide adequate insulation and ventilation to prevent water leaks and heat loss.
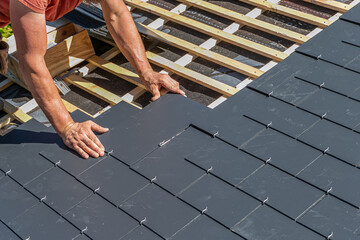
For shingle roofs, contractors begin by laying a base layer of waterproof underlayment. Next, they install a series of overlapping shingles to create the roof’s surface. They use special tools to determine the reveal (the uncovered portion of the shingle that sits over the shingle above it) and stagger the shingles to prevent gaps or breaks.
Finally, the contractor covers any exposed areas of the roof with flashing to protect them from moisture. This includes the eaves, roof valleys, and any vents or chimneys. He may also add attic vents for better air circulation and energy efficiency.
Maintenance
The roof of a building acts as its primary shield from the elements, but it needs regular maintenance to remain in peak condition. There are a variety of tasks that can be performed to ensure the roof remains sturdy and watertight, including surface maintenance, cleaning, repairing, and even replacing certain components.
Surface maintenance includes a visual inspection of the entire roof for obvious damage and problems, such as:
Loose or damaged shingles These can expose the material beneath to moisture, leading to leaks.
Missing granules These small, round bits of material cover the shingle and protect it from UV rays and moisture. The loss of granules can accelerate shingle deterioration.
Cracked or distorted vents These can lead to water intrusion and air infiltration.
Caulking around chimneys, vent pipes, skylights, exhaust fans, and air conditioning units These help prevent leaks from weather and insects. Inspect and replace caulk as needed to maintain its integrity.
Tree limbs Heavy storms, natural disasters, and other factors can cause tree limbs to break off and fall onto the roof. It’s important to trim trees regularly to reduce the chance of them falling on the roof and causing damage.
In addition to these visual inspections, more technical maintenance practices can also help extend the life of your roof. These may include infrared scans to detect moisture trapped underneath the roofing membrane, water testing to identify leaks, and wind uplift testing to verify the structural integrity of the roofing system.
Gutter maintenance is another key component of roofing upkeep. Clogged gutters can cause water to back up and seep into the roof deck, leading to rot, mold, and water damage. Ensuring that gutters are free from debris and securely fastened helps to protect the roof’s edges and foundation from costly problems.
In regions that experience significant snowfall, snow and ice removal may be necessary to prevent the formation of ice dams. Ice dams form when snow melts and refreezes at the roof’s edge, causing water to pool and seep under shingles. This can lead to significant water damage to both the roof and interior ceilings and walls. Professional roofing services often provide ice dam removal and prevention techniques, including the installation of heated cables or enhanced insulation in the attic.
Seasonal maintenance checks are also recommended to prepare the roof for extreme weather conditions. Before winter, for example, a thorough inspection can ensure that all roofing materials are intact, all flashing is properly sealed, and that insulation and ventilation are sufficient to handle the drop in temperatures. In spring, post-winter assessments can help identify any damage caused by ice, snow, and wind, ensuring timely repairs and prolonging the lifespan of your roof.
A roof is not just a protective barrier, but also a key part of your building’s structural integrity and energy performance. Investing in regular inspections and maintenance services can reduce long-term costs and help maintain the beauty, function, and safety of your home or building. Whether you opt for traditional shingles, elegant slate, modern metal, or eco-friendly solar options, proper care and timely attention ensure that your roofing system continues to serve as a reliable shield for decades to come.
In conclusion, the roof is more than just the crowning structure of a building. It is a complex system that integrates multiple materials, design choices, and mechanical functions to protect, insulate, and beautify a home or commercial property. Choosing the right materials, ensuring professional installation, and maintaining the roof with diligence are critical steps toward safeguarding your investment and securing the comfort and safety of its occupants. When in doubt, consulting with professional roofing contractors like Lakewood Roofing can provide peace of mind and expert guidance, whether you’re repairing a leak or considering a full roof replacement.